You can create custom text fields to appear in your bar/container details to help standardize roadmaps across your account.
Creating Custom Text Fields
Account Admins can create custom fields by clicking into Account Settings in the bottom left corner of your screen. You'll then click Standardize, and then click on the Custom Text Fields page. Click the New field button and provide the name of the field, then click Save. Once created, the custom fields have the ability to appear in all roadmaps across the account. This will be set on a per roadmap basis by each Editor.
Account Admins have the option to add up to 100 custom text fields within the account. Up to 10 custom fields can be applied at the roadmap level.

Note: You can also delete custom fields from your Settings, as well. Please note that this will delete that field across all roadmaps and any data that may have been populated in that field.
Team Custom Text Fields
Similarly to the account Account Admin, the Team Admin will be able to create up to 100 custom text fields under their Teams tab.
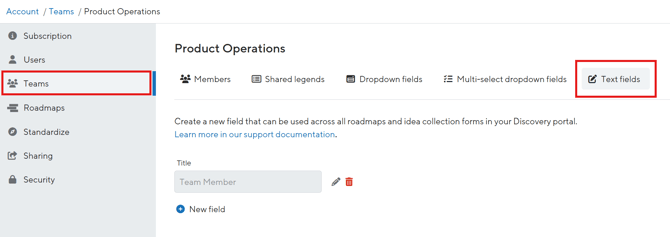
Note: Up to 100 custom fields of any configuration (dropdown, text and/or shared legend) can be created per team.
Utilizing Custom Fields
Once configured at the account and/or team level, each roadmap has the flexibility to select the appropriate fields. To get started on the personal roadmap configuration, click Settings (gear icon) and select Fields. This is where you're able to customize the fields for your roadmap. You can select up to 10 custom fields between the company custom fields and the team custom fields. Click the Add fields button to select the custom fields you want to add to your roadmap, then click Save.

You can click on a bar or container on your roadmap to enter text into the custom field(s).
You can also choose to view your custom field as a column in your roadmap's Table Layout.
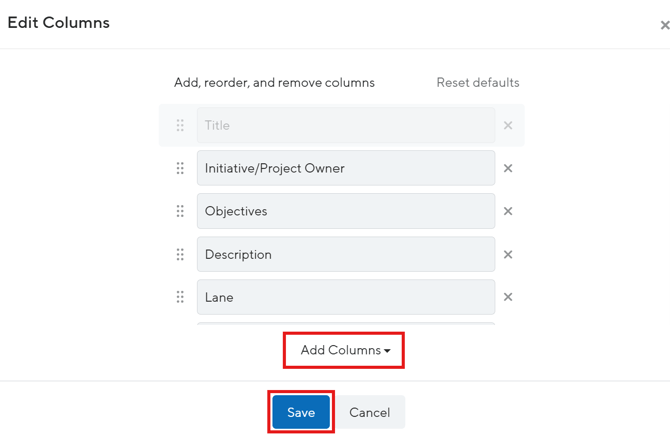
By default, custom fields will not be displayed in the Table Layout. To make them visible in the Table Layout, click the Edit Columns button in the top right corner of the table. In the Edit Columns pop-up, click the Add Columns button and select the custom field to bring into the view, then click Save. The custom field will now be visible in the Table Layout and can be updated directly in the table.